Blog Article
Using Protocol 17’s Asset Clawback
Author
Tyler van der Hoeven
Publishing date
Protocol upgrade
Asset clawback
On June 1st, 2021, the Stellar network upgraded to Protocol 17, which includes one major — and incredible — new feature: Asset Clawback. The opt-in Ctrl-Z for the Stellar blockchain.
At its core, Asset Clawback is pretty simple: it’s a set of two new operations and an account flag that allows issuers to claw back tokens from any token-holding account.
We'll get into how it works below, but before we do, I want to point out that Asset Clawback makes it easier to issue specific types of regulated assets such as money market funds, bonds, and equities on Stellar. It doesn't affect assets users currently hold, and all clawback-enabled assets are clearly designated by account flags that are visible on the public ledger. If and when users opt-in to hold a clawback-enabled asset, they do so with eyes wide open.
Let’s dig into how you would actually set up, issue, and claw back a Stellar asset.
There are three primary steps:
- Setup the Issuing account and Payee.
- Issue the asset.
- Claw it back.
Set up the issuing account
I’ll be using the Stellar Laboratory today, but you could just as easily do this with any one of the Stellar SDKs or even by making raw API requests to Horizon.
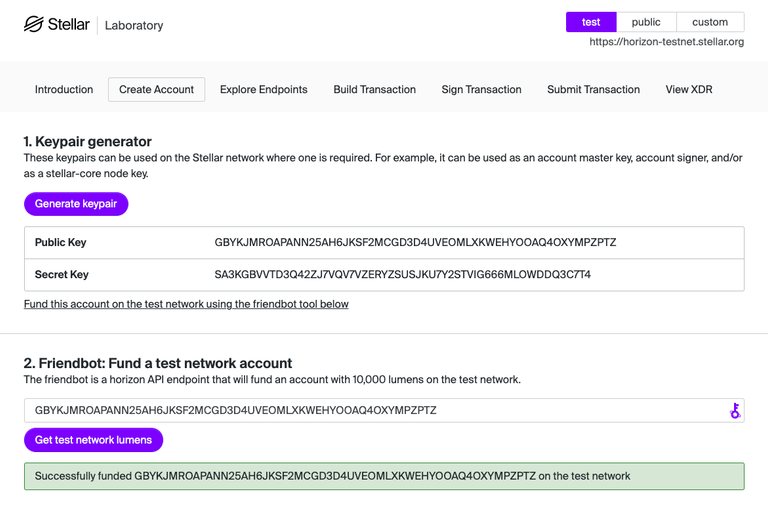
First, let’s create and fund a brand new Stellar account. Since we're doing this on the testnet, we can take advantage of friendbot to get some free testnet XLM. This account will serve as our clawback-enabled asset’s Issuing account.
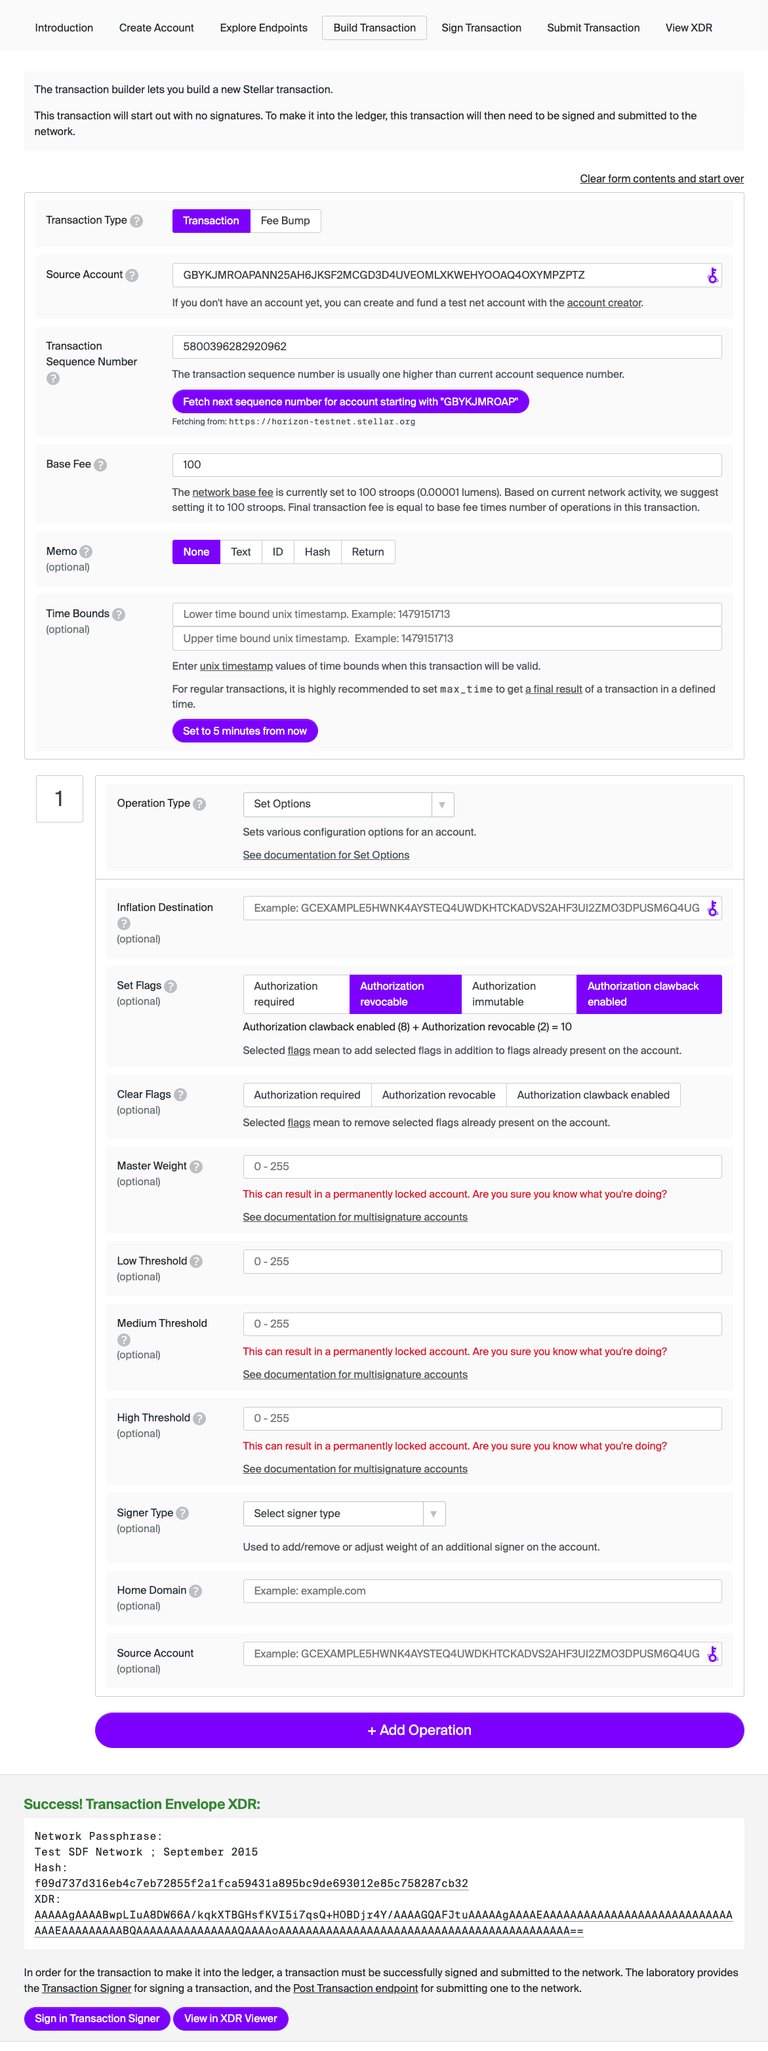
Next, we need to properly set a clawback-enabled flag so any assets issued by this account in the future will be clawback-enabled. We’ll do this in the “Build Transaction” tab.
We’ll set the source account to the Issuing account's public key from the previous step, fetch the next sequence number, set our base fee, and finally add a single “Set Options” operation with both the Authorization revocable and the Authorization clawback-enabled flags set.
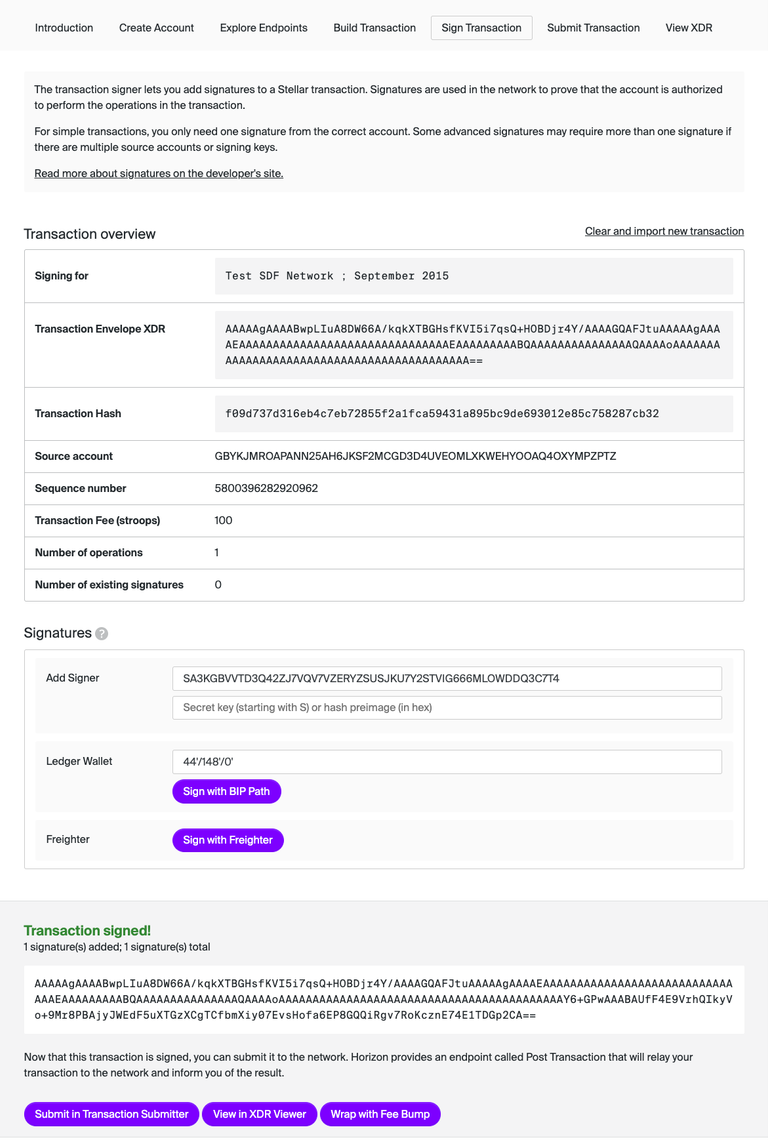
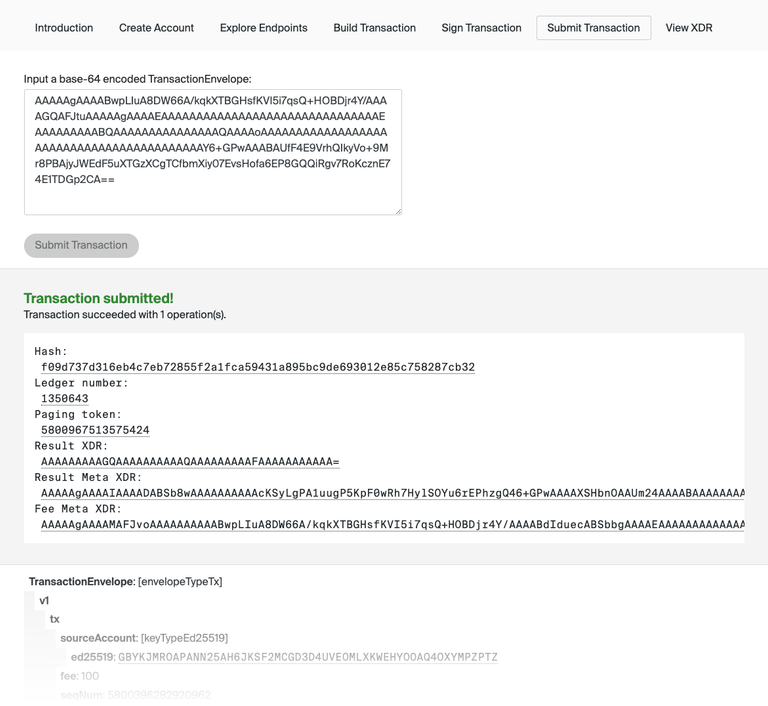
Next, we’ll sign this transaction with the Issuing account's private key and submit it to the network, completing the Issuing account setup process.
Issue the asset
Super! Our Issuing account is now fully prepared to issue clawback-enabled assets. Let’s go ahead and do that.
First, we’ll create and fund another brand new keypair from the “Create Account” tab using the same process we used to create the Issuing account. This second account is our Payee. It's the user account that will receive the clawback-enabled asset and ultimately have some of it clawed back.
Next, we create a transaction with two operations.
- The Payee creates a trustline for an asset issued by the Issuer account.
- The Issuing account makes a payment in the clawback-enabled asset, which I've decided to call CLAWBACK, to the Payee.
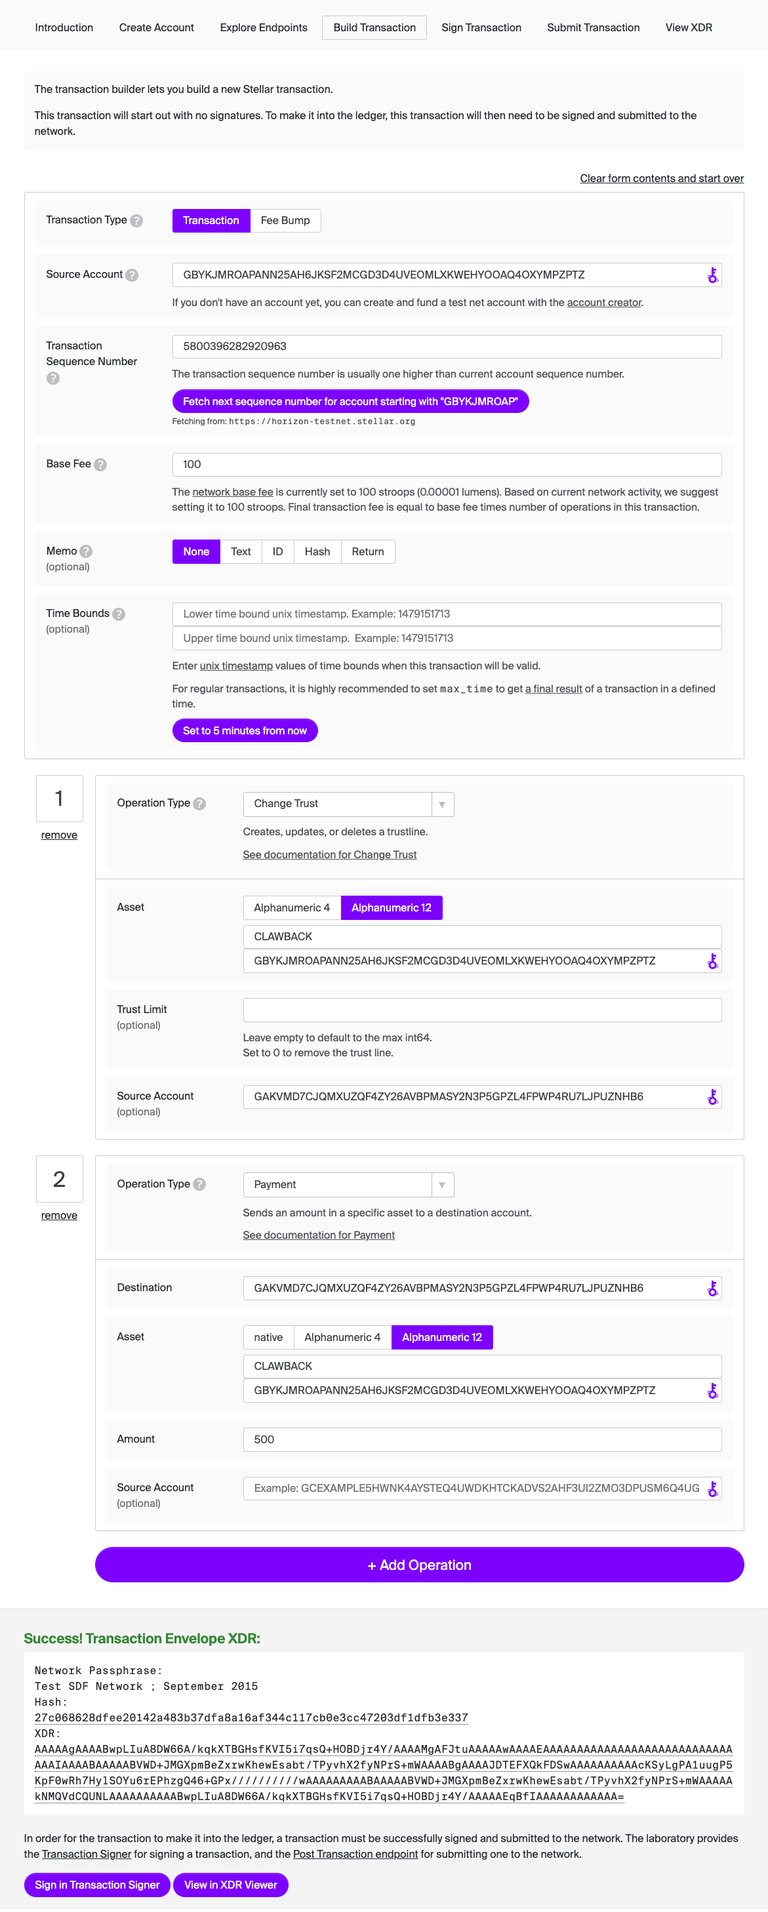
You’ll notice that before the Issuing account can make the payment to the Payee, the Payee has to opt-in to holding the asset by creating a trustline. The Payee literally signs the transaction to confirm willingness to hold the asset.
Since the Issuer is the source account for the transaction and the CLAWBACK asset payment, it also has to sign the transaction to authorize the payment. This transaction, in other words, requires signatures from both accounts.
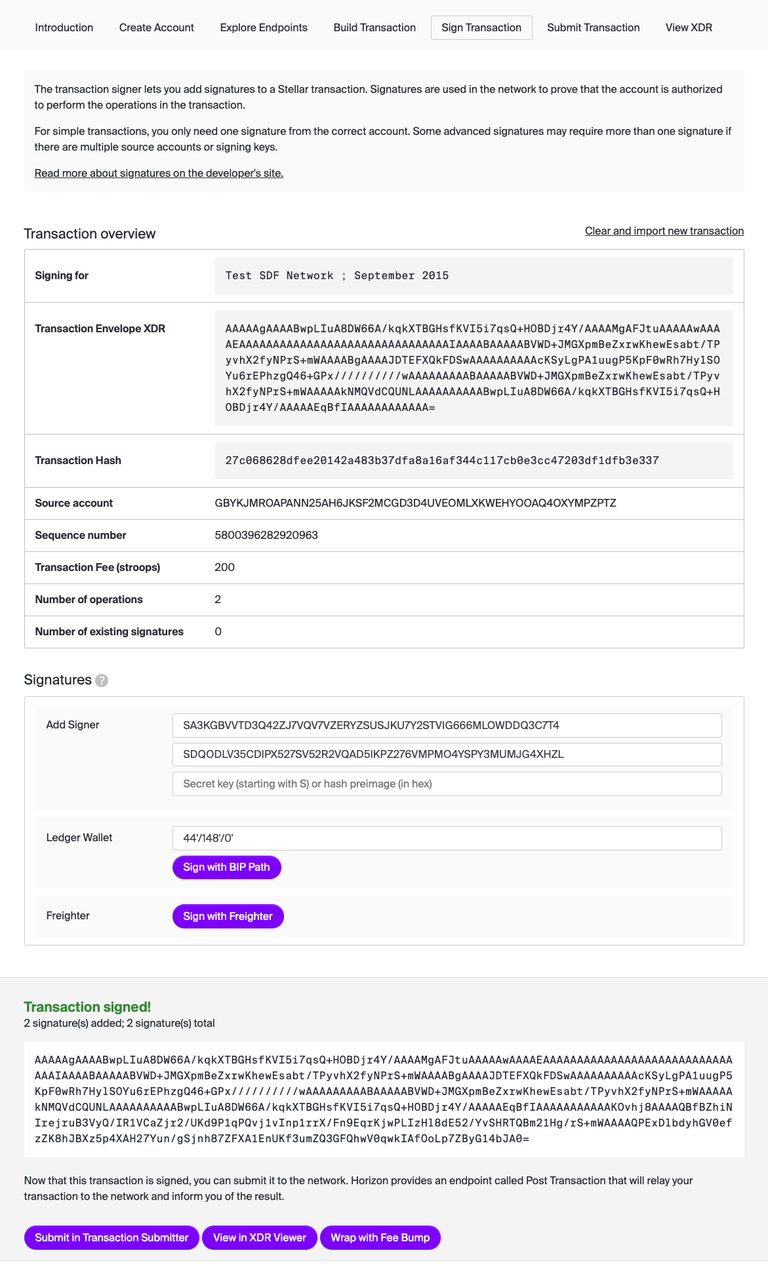
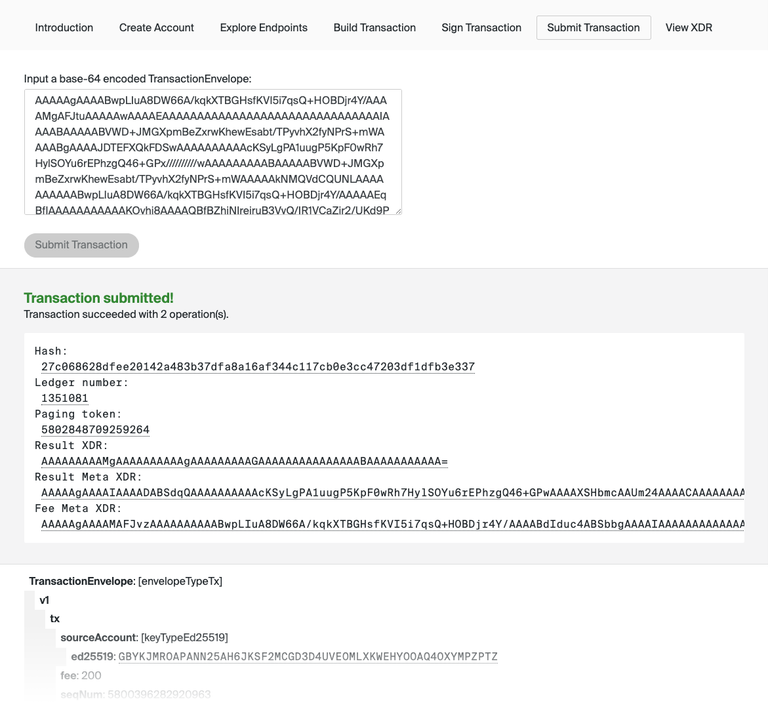
Let’s finally submit this transaction and finalize the CLAWBACK payment.
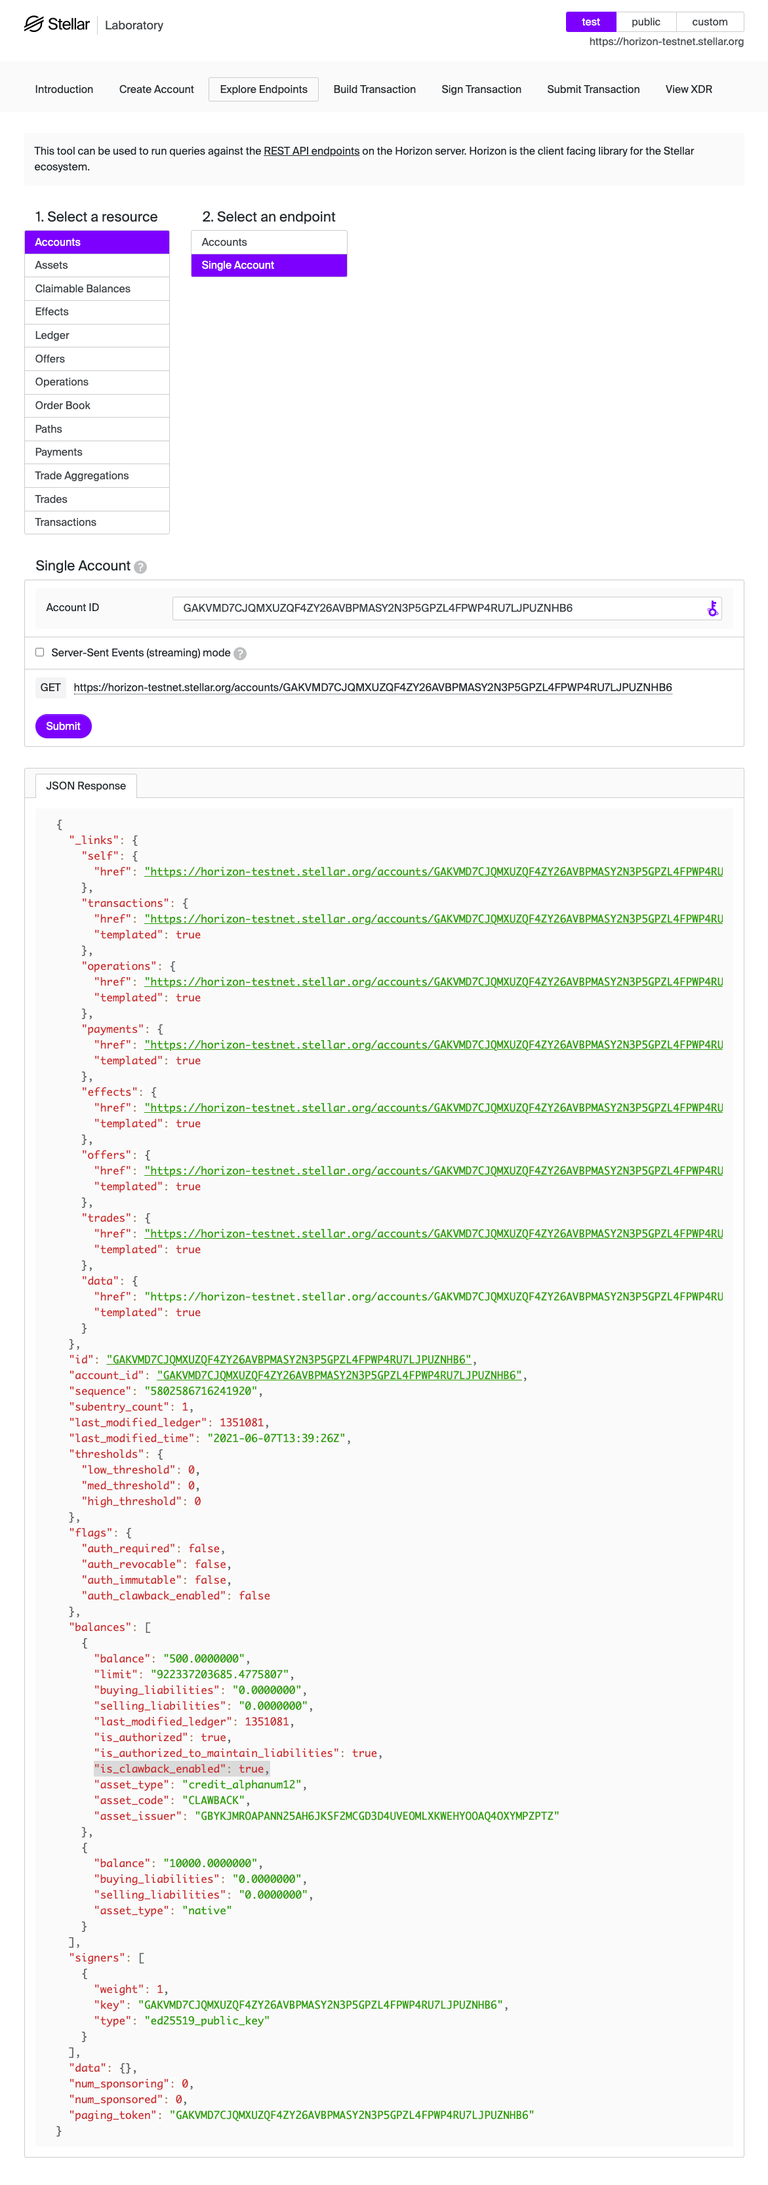
If we look up the Payee account balance now (see highlighted code), we’ll notice it has 500 units of the CLAWBACK asset, and that the trustline is marked as "is_clawback_enabled": true. That flag is fully visible to the Payee.
Claw it back
Let’s go ahead and do it – the previously impossible – let’s revert! Let’s claw some of these assets back from the Payee. The process is simple: the Issuing account creates one final transaction that makes use of the new “Clawback” operation.
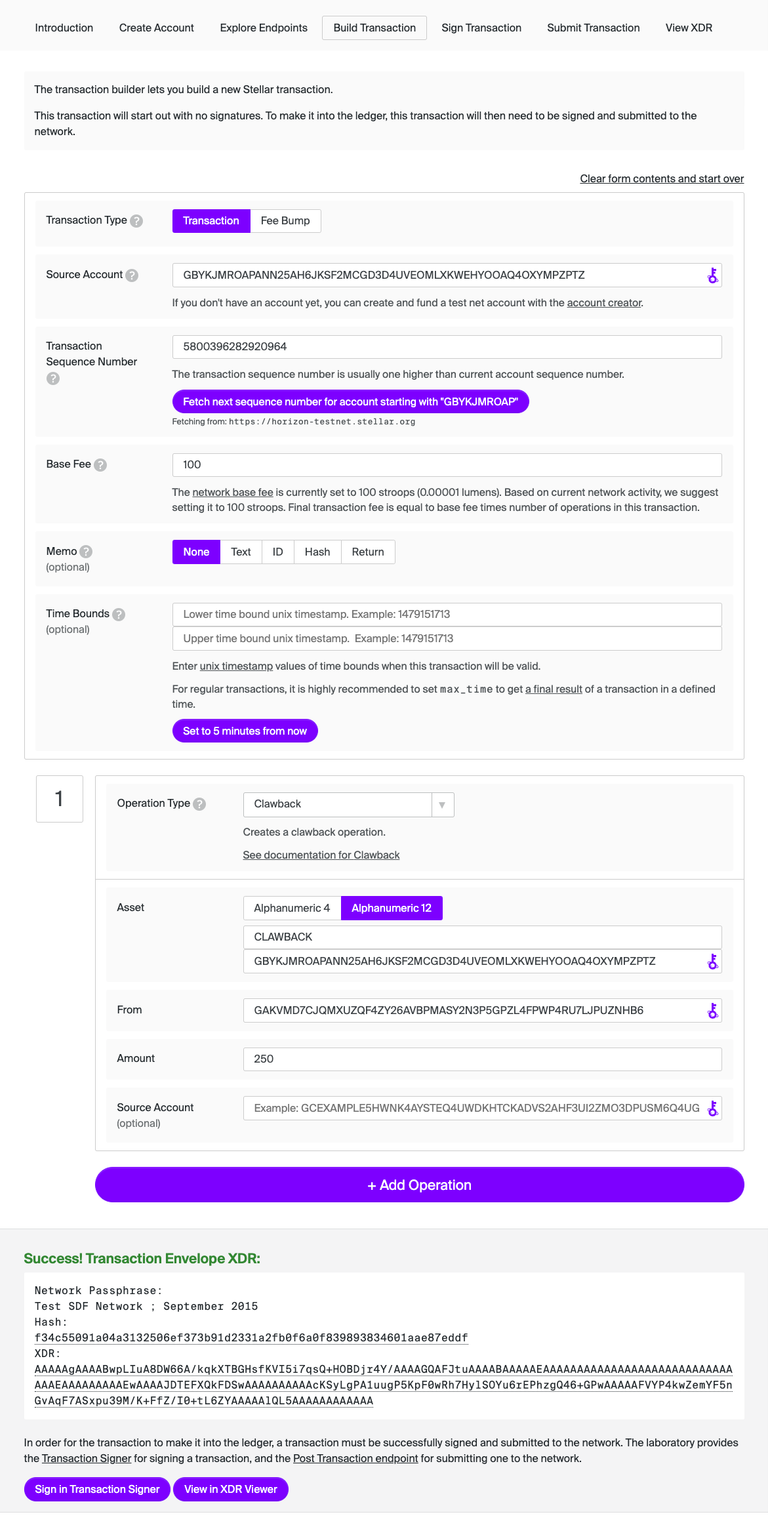
Excellent! Let's make the Issuing account sign and submit that transaction, and then take a look at the Payee account balance to see if it changed. If we’ve done everything right, it should have decreased from 500 to 250 units (see highlighted code below).
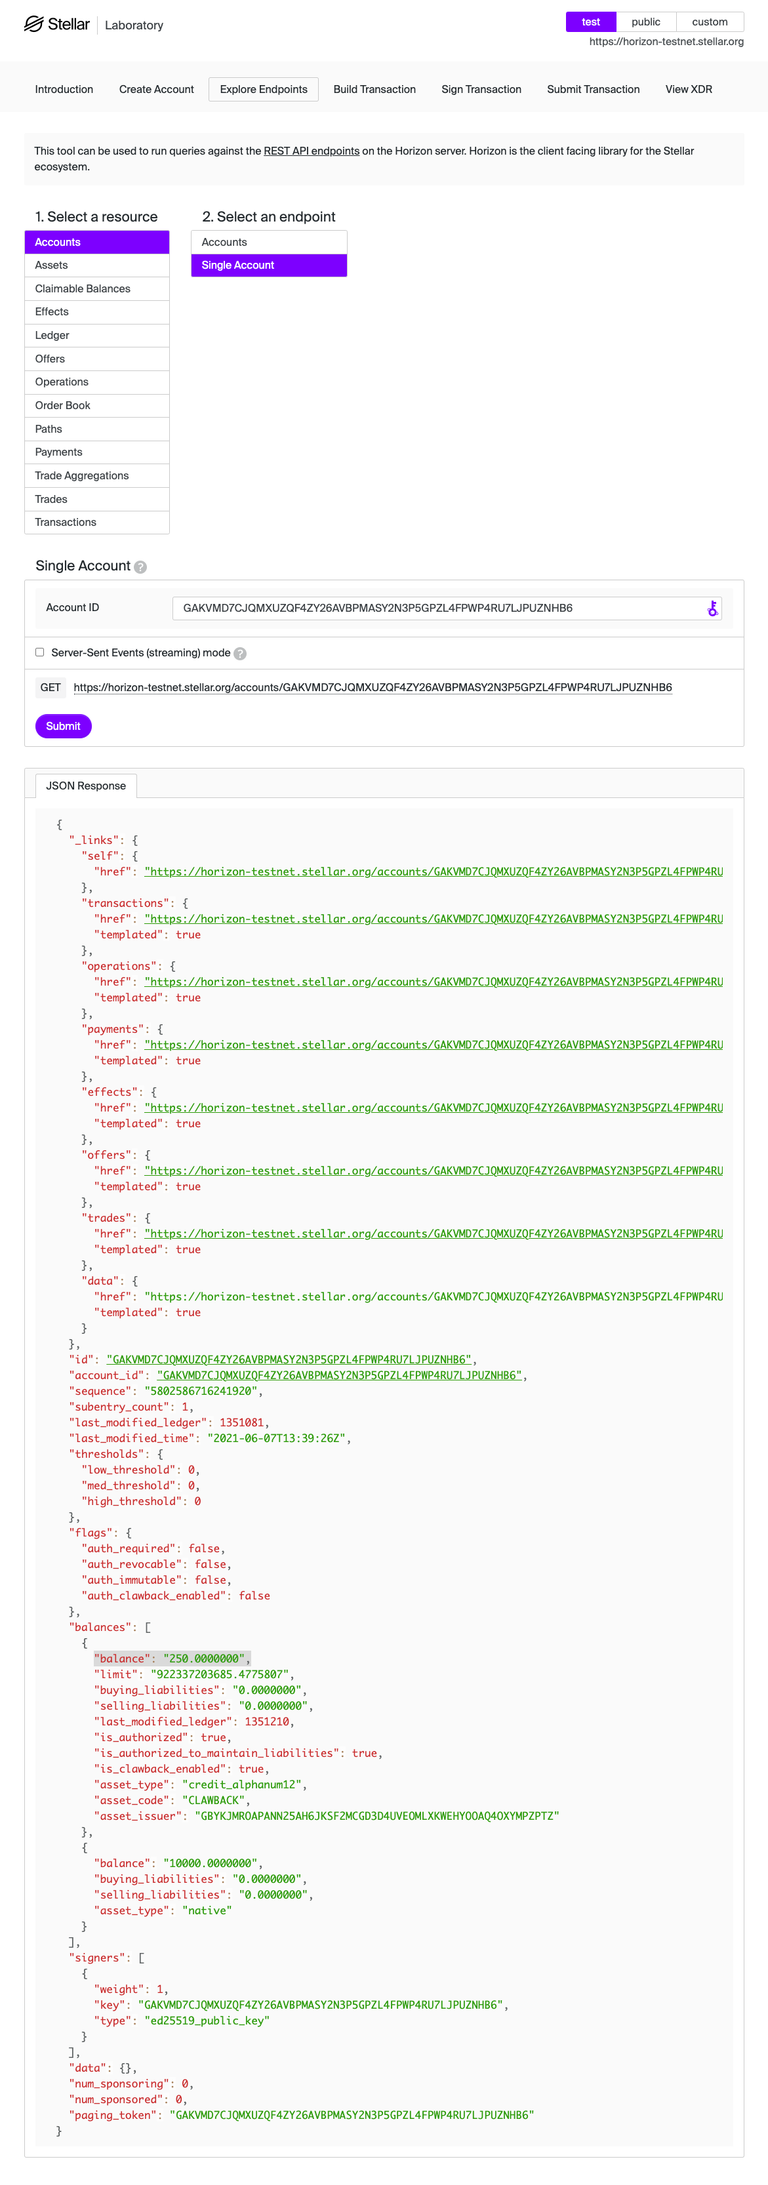
Incredible! The 250 units of the balance has been successfully clawed back to the issuing account, effectively burning them from existence.
Conclusion
Asset Clawback may seem like a small change, but for the regulated asset issuance space, it's the difference between using blockchain or not. It adds tooling that makes it easier for issuers to comply with various regulatory requirements, which helps bring traditional financial use cases and instruments into the 21st century. It extends Stellar's ability to make value transfer fully digital and accessible for anyone anywhere in the world.
Final technical notes: above, we looked at clawing back a portion of a balance. But when an asset is clawback-enabled, you can also use the clawback claimable balance operation to clawback a claimable balance.
It’s also worth noting that issuers can remove the clawback-enabled flag from individual trustlines by using the new “Set Trust Line Flags” operation, and that operation replaces the now legacy “Allow Trust” operation.
To learn more about the Asset Clawback feature, see:
Interested in learning even more about the technical side of Stellar in digestible bite-size portions? Join Stellar Quest!